How to make a proper vegetarian pho from scratch — the broth technique that gives it the depth most recipes skip
- Updated on Apr 26, 2026
Most vegetarian pho recipes tell you to simmer some vegetables for an hour and call it done. That’s like expecting a single guitar string to play a symphony. The result? A thin, one-note broth that makes you wonder why you bothered making pho from scratch in the first place.
The secret isn’t just cooking vegetables longer. It’s about building layers of flavor through charring, roasting, and proper extraction techniques that most recipes completely ignore.
After spending years perfecting this recipe, including some enlightening conversations with street vendors during travels through Vietnam, I’ve cracked the code on getting that deep, complex flavor that makes restaurant pho so addictive.
Why most vegetarian pho falls flat
Traditional pho gets its depth from beef bones simmered for 12+ hours. The bones release collagen, minerals, and compounds that create body and richness. When you remove the bones, you can’t just throw some onions in water and expect magic.
The mistake most recipes make is treating vegetarian broth like vegetable stock. They focus on extraction without considering caramelization, umami development, or proper layering. Your broth needs multiple flavor sources working together, each contributing different notes at different stages.
Think of it like building confidence in any skill. You don’t just practice one technique and expect mastery. You layer different approaches, each reinforcing the others until you have something substantial.
The charring technique that changes everything
Before anything touches water, you need fire. Charring your aromatics creates compounds that simmering alone never will. This isn’t optional garnish work. It’s foundational.
Take a whole onion, halved lengthwise, and a 4-inch piece of ginger, sliced lengthwise. Place them cut-side down in a dry cast iron pan over high heat. Don’t move them. Let them char until they’re properly blackened, about 8-10 minutes. The smell might worry you at first. That’s normal. You want legitimate char, not just browning.
While those char, toss whole star anise, cinnamon sticks, cloves, and coriander seeds in another dry pan over medium heat. Toast until fragrant, about 3-4 minutes. The spices will tell you when they’re ready. They’ll release their oils and fill your kitchen with warmth.
This process reminds me of tending herbs on my balcony. You can’t rush growth by overwatering. Sometimes doing less, but doing it properly, yields better results.
Building your base broth
Now for the foundation. In your largest pot, add 3 liters of water, your charred onion and ginger, and your toasted spices tied in cheesecloth. Add 2 daikon radishes (chunked), 4 dried shiitake mushrooms, and a sheet of kombu seaweed.
Here’s where most recipes fail you. They say simmer for an hour. Wrong. Bring it to a boil, then reduce to the gentlest simmer possible. Barely moving. Cook for 3 hours minimum, 4 if you can manage.
During the first hour, add 2 tablespoons of yellow rock sugar (or regular sugar), 3 tablespoons of soy sauce, and 1 tablespoon of salt. These aren’t just seasonings. Sugar helps develop color and body. Soy sauce adds umami depth. Salt opens up flavors.
The roasted vegetable addition
Two hours into simmering, prepare your roasted vegetables. This second wave of flavor is what separates good pho from unforgettable pho.
Toss quartered mushrooms (shiitake, king oyster, whatever you have), carrot chunks, and celery pieces with oil. Roast at 425°F until edges blacken, about 35 minutes. Add these to your simmering broth for the final hour.
The roasted vegetables release different compounds than the simmered ones. They bring sweetness, earthiness, and that subtle smokiness that makes people stop mid-slurp and wonder what’s different about your pho.
The umami boost most recipes miss
Forty-five minutes before finishing, add your secret weapons: 2 tablespoons of fermented bean paste, 1 tablespoon of tomato paste, and if you have it, a splash of mushroom soy sauce.
These ingredients might seem strange for pho, but they’re doing heavy lifting. Fermented bean paste adds depth without announcing itself. Tomato paste brings glutamates and subtle sweetness. Mushroom soy carries that meaty quality vegetarian broths often lack.
You might have read my post on building umami in plant-based cooking. Same principle here. Layer different umami sources and they amplify each other exponentially.
Straining and finishing your broth
After your marathon simmer, strain everything out. Press the solids to extract every drop of flavor, then discard them. They’ve given their all.
Return the broth to heat and taste. It should be rich, complex, slightly sweet, with layers revealing themselves as it cools on your spoon. Adjust salt, add more soy sauce if needed, maybe a squeeze of lime.
The clarity comes from that gentle simmer. If you boiled hard, you’d have cloudy broth. Like meditation practice, sometimes the gentlest approach yields the clearest results.
Assembling your perfect bowl
Cook your rice noodles separately according to package directions. Never cook them in the broth. They’ll cloud it and absorb too much liquid.
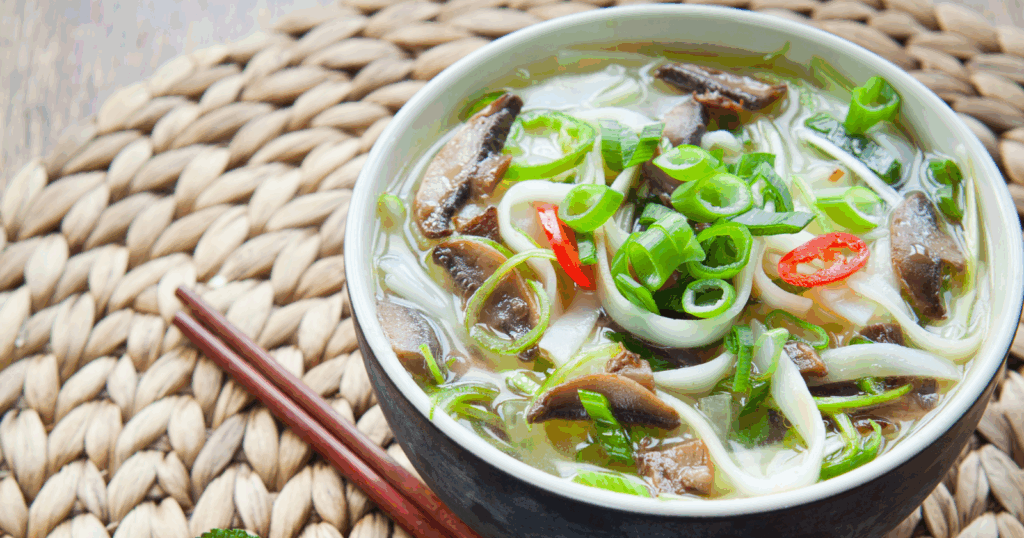
In each bowl: noodles first, then pour boiling broth over them. Top with thin-sliced firm tofu (briefly seared if you want), blanched bok choy, and your fresh herbs. Thai basil, cilantro, mint, whatever you love.
The traditional accompaniments matter. Bean sprouts, lime wedges, sliced chilies, hoisin sauce, sriracha. Set them out and let people build their own perfect bowl. There’s something grounding about this ritual, like tending a garden. Each person creates their own balance.
Making this process manageable
I know four hours seems insane for soup. But here’s the thing about developing any worthwhile skill or habit. You can’t hack your way to depth. Some things require time.
Make the broth on Sunday while doing other things. The active time is maybe 30 minutes total. The rest is just occasional stirring. The broth keeps for a week refrigerated, months frozen. Make double and future you will be grateful.
Once you taste the difference between this and quick versions, you’ll understand why the time matters. It’s like the difference between a rushed morning and one where you actually sit with your coffee. Same ingredients, completely different experience.
The payoff is worth the effort
This broth technique transformed my vegetarian cooking. Once you understand how charring, roasting, and slow extraction work together, you can apply these principles everywhere. Your vegetable stocks improve. Your soups gain dimension. You stop apologizing for vegetarian versions of traditionally meat-based dishes.
More importantly, you learn that good things can’t always be rushed. In cooking, as in personal growth, the practices that seem too time-consuming often deliver the most profound results. That depth you’re craving? It was never hiding in a shortcut. It was waiting in the patient building of layers, each one supporting the next, until you had something worth savoring.
Comments