Nasi Goreng – Indonesian Style Fried Rice


Nasi goreng
Servings:2 people
Calories:559kcal
Ingredients
- ½ cup rice (uncooked, preferably brown Basmati)
- ½ tsp vegetable broth
- 4 tbsp sesame seeds
For the Nasi Goreng
- 2 tsp olive oil
- 1 onion
- 1 leek
- 1 carrot
- 1 bell pepper, red
- 1 handful bean sprouts
- 1 clove garlic
- 2 tbsp soy sauce
- ½ lime
- Salt and pepper to taste
For the Peanut Sauce and Sesame Seeds:
- ½ cup low fat coconut milk (½ cup = 100 ml)
- 2 tbsp peanut butter
- 1 tsp tomato paste
- 1 tbsp soy sauce
- 2 tsp maple syrup
- ¼ lime
Instructions
- Prepare the rice according to package instructions. Once cooked, crumble vegetable broth on top of the rice when it’s still hot and give it a good stir).
For the Nasi Goreng
- Slice the onion. Peel and slice the carrot.
- In a big pan sauté the onion and carrots in olive oil on medium heat.
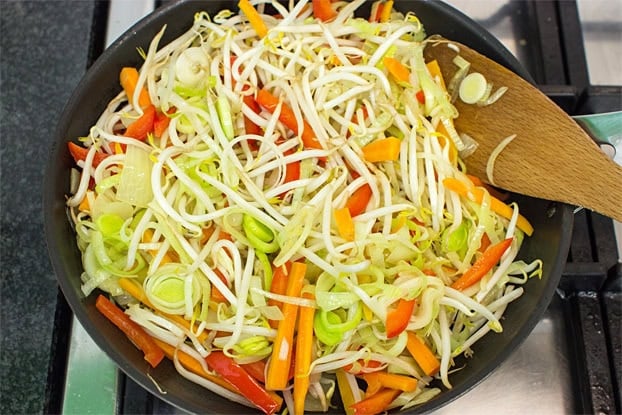
- In the meantime, cut and wash the leek, cut the bell pepper, wash the bean sprouts. Cut or crush the garlic, and throw these ingredients in the pan as soon as you’re done. They only need to cook until they’re a bit softened.

- The bean sprouts and garlic go in last (together) and only need 2 minutes tops.
- Now, add the cooked rice (still on medium heat). Fry the rice for about 3 minutes, stirring it really well, combining it with all the vegetables.
- Add soy sauce and a squeeze of lime to the mix. Stir well for another 2-3 minutes. Season with salt and pepper. Done!
For the Peanut Sauce and Sesame Seeds
- Throw the sesame seeds into a pan on medium heat without oil and toast until they’re golden brown - about 3 minutes.
- In a pan and on low heat, add the peanut butter, coconut milk, juice of half a lime, soy sauce, tomato paste and maple syrup. Stir and taste. Add more soy sauce, salt, or lime to your liking and bam: you just made yourself a great peanut sauce. Take it off the heat after 2-3 minutes and transfer to a serving bowl.

- Serve with peanut sauce on the side and sprinkle some sesame seeds and optional fried onions on top. Hmmm. Selamat Makan (enjoy your dinner)!
NOTES
You’ll need one pan, and a large frying pan or a wok.
Christine’s pro tip
The secret to a good nasi goreng is perfect rice. So, if you’ve got the chance, prepare the rice according to instructions on the package, ideally the night or morning before. Crumble the vegetable stock cube over the rice when it’s still hot and let it rest for at least 4 hours. When you start cooking, the rice should be as dry and cooled off as possible.
Nutrition
Nutrition Facts
Nasi goreng
Amount per Serving
Calories
559
% Daily Value*
Fat
24
g
37
%
Saturated Fat
7
g
44
%
Sodium
1854
mg
81
%
Potassium
751
mg
21
%
Carbohydrates
73
g
24
%
Fiber
8
g
33
%
Sugar
15
g
17
%
Protein
16
g
32
%
Vitamin A
7764
IU
155
%
Vitamin C
96
mg
116
%
Calcium
254
mg
25
%
Iron
5
mg
28
%
* Percent Daily Values are based on a 2000 calorie diet.
DID YOU MAKE THIS RECIPE?Tag @HurryTheFoodUp on Instagram so we can admire your masterpiece!


Whoops, sorry, we meant to give it 5 stars
Hi, husband cooked this this evening and we were both bowled over by it. It is amazing. Husband a little concerned about the lonely spoon of tomato paste that was left sitting on the counter top after the meal was cooked..Was it to be added to the sauce or the veggies?
Cheers
I tried this and it was lovely but … when I’d finished I realised I still had a bowl of toasted sesame seeds sitting in the kitchen. I presume from the pictures that they are added last but the recipe doesn’t mention them at all, apart from the toasting, and at that stage I was reading the words rather than looking at the pics! No way I could do the prep and cooking in 25 mins.
Hi Susan, you’re absolutely right, adding the seeds has disappeared somewhere down the line. I’ll add it back into the recipe now, thanks for the heads up. With regards to the prepping – the recipe will get much quicker each time you make it. I find it helps to think like a production line in a factory – lay out all the ingredients you need, wash them all at the same time, chop them all at the same time (go for the carrots and onions first). Each step you do at the same stage saves a little time 🙂